

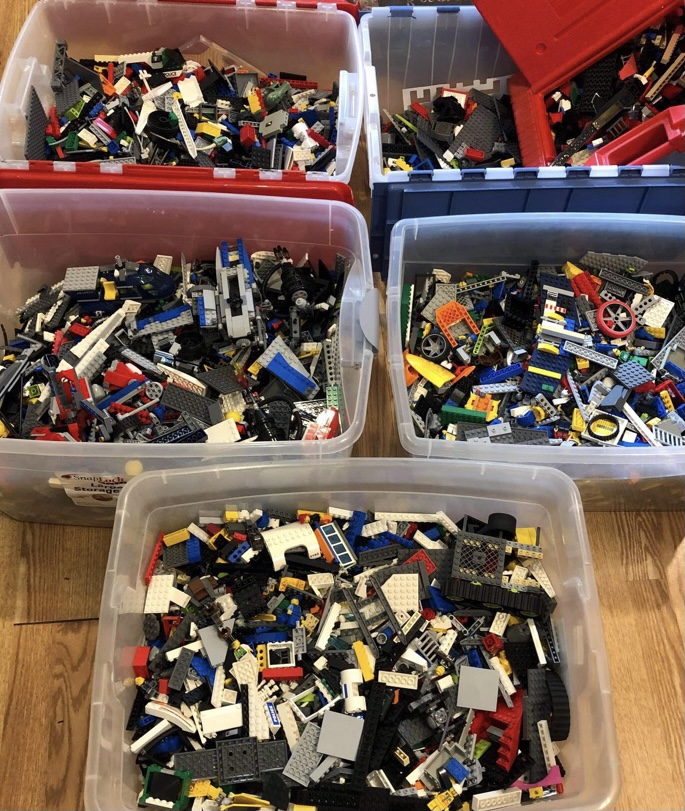
Secondhand LEGO hauls are exciting. Big bins of chaos and creative potential with assorted pieces from who-knows-what sets. But they can also be dirty. Before introducing them to your collection, it’s probably a good idea to wash them. And even LEGO you’ve had for a while that have gathered dust and dirt for whatever reason could use a bath every so often.
Washing hundreds or thousands of LEGO pieces at a time may seem daunting, but we’ve adopted some methods that make it about as painless as possible. Read on for our steps and some tips.
You will need:
- Bathtub or freestanding tub/drum (should hold five gallons at the very least)
- Faucet
- Dish soap
- Fine mesh laundry bags
- Two brick separator tools
- Several towels (beach towels work great)
- Solid trays or bin lids to keep towel moisture off the floor
- Space to place the drying trays
- A few days
Separate and bag the pieces
If your bulk lots have been anything like ours, you’ll find partially-built models and pieces stuck together for no apparent reason. To get the pieces as clean as possible, you’ll want to separate them. A good way to do this can be to place them in the mesh laundry bags as you go through separating. And the brick separators can come in handy here (available on Amazon). Try to get all of the pieces separated, but in my experience some joined pieces inevitably slip through.
You may want to put pieces with stickers aside, to separately clean more gently. But this is also a good time to reconsider whether you still want the sticker on the piece and remove it if you want to – especially if it’s crooked or partially detached.
There will probably be non-LEGO toys in there, so this is also a good opportunity to sort out unwanted pieces. (I’ve found some K’NEX, and interestingly, they do have some compatible bricks.) There may also be weird and questionable things in there. Among the unexpected things I’ve found in hauls: stone, metal screw(!), Allen wrench, piece of chalk, some sort of dried fruit (yuck), and pieces of kids’ modeling clay. The LEGO watch links were a nice surprise, though.
Fill each mesh laundry bag about half full, maybe two-thirds. The extra space allows for good agitating. Use fine mesh laundry bags (these have worked well for us so far, also Amazon has these less expensive ones).
The fine mesh is important, especially with so many tiny LEGO pieces (including 1×1 tiles). Before getting our fine mesh bags, we tried a regular mesh (bags from a dollar store), and lots of the tiny pieces were getting stuck.

The very first time we washed was without any bags at all. It was lots of work picking up all the wet, tiny pieces, so we’ll never do that again.
Wash the pieces
You may want to do a preliminary rinse for each bag, to minimize dirt getting into the bath water. Once you’re ready to wash, run them a bath with some warm water and some dish soap. (Be sure to plug the drain, and definitely be sure the bags are zipped closed!)

Once your bags of LEGO are free-floating in the bath, you can let them soak a bit. To agitate, massage the bags and make a point to move the pieces around. Repeat as much as you’d like. Underwater LEGO make kind of uniquely cool sounds. The water may even get visibly dirty. Repeat the above washing steps if you think you need to.
Once you’re satisfied with the washing, drain the water from the tub, moving the bags opposite the drain, and let as much soapy water drip off the bags as you can. Like the optional step before starting to wash, give each bag a preliminary rinse under the faucet. Rinse the suds from the work area to the extent you can. Then run another bath with cool water for the rinse bath. Again, agitate the bags. If you suspect there’s soap left, repeat the rinse cycle.
Once you’re satisfied with the rinsing, it’s time to drain the rinse water and start the drying process.
Dry the pieces
Like we did with letting the soapy water drip off between the wash and rinse stages, you’ll want to do as much drip-drying as possible, to make the tray-drying process go smoother.
After draining the rinse bath, move the bags opposite the drain, and then position them to let gravity help them drip-dry in the tub. You’ll want to move them around every so often. While the bags are drip-drying, you can prepare for the next step, tray-drying.
You could put drying pieces on plastic trays or bin lids, but then there won’t be anything to absorb the moisture. Or you could put them on towels, but moisture can creep through to your flooring. Sounds like both have a role here.
To prepare a drying tray, drape a towel over a tray, or wrap it around. Do several of these, enough to comfortably place the LEGO pieces you just washed.
Once the pieces have drip dried, they can be placed on drying trays. Ideally place them by hand, don’t dump the bag (more water can transfer that way). When you first place the pieces, keep everything on top of a plastic tray (don’t go off the edges). Keeping the biggest pieces separate from the others can promote optimal air flow.
The drying process requires some patience, but there are some things you can do to help things along. (In our experience, full drying takes a few days. A video we found some time ago said about it taking something like a couple of hours, but we’ve identified some good reasons why it takes longer.)
- If things seem wet from the top, you can use a separate towel to absorb moisture that way.
- Rotate the placement of the pieces on the trays, changing their positions, etc. Same goes for the towel, especially if it’s more than just a bit damp.
- A handy trick for big bricks with lots of (water-collecting) tubes is to sharply shake them out – you can get a lot of water out of those. Same goes for other pieces that manage to collect lots of water.
- Tiny pieces like 1×1 tiles tend to stick to big flat panels – separate them by hand when you can.
- If you have a ceiling or other fan in the room, this can help! (Though don’t let it blow dust on your clean LEGO.)
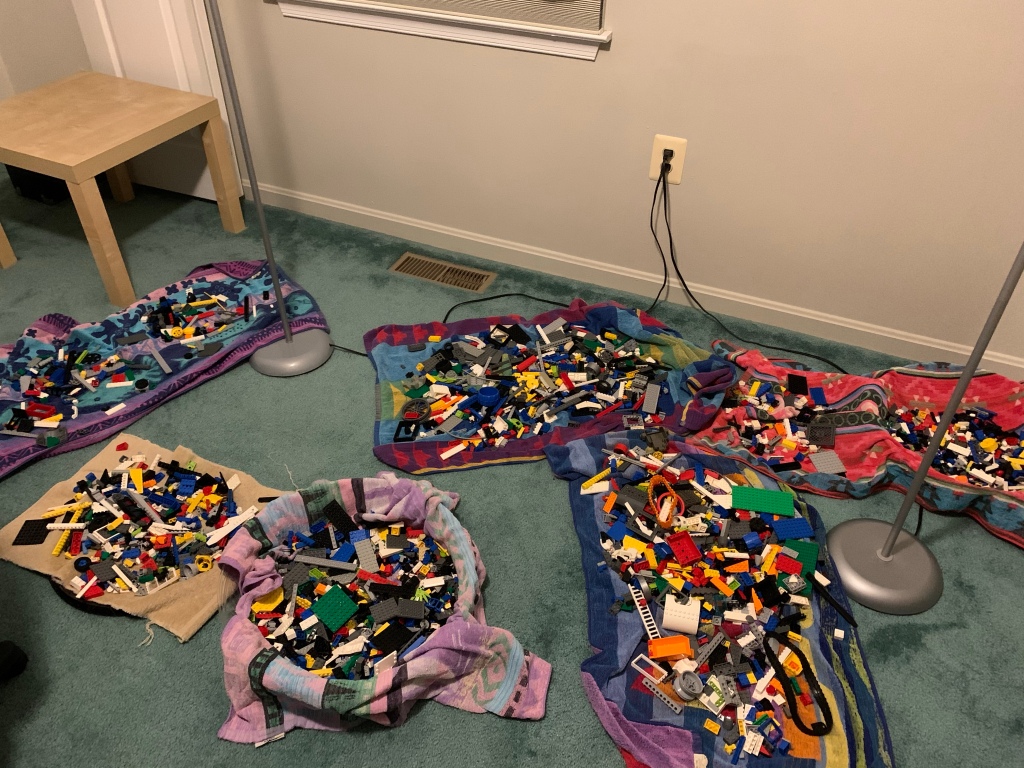
- As things start to dry, spread out the towels from the immediate tray area, and give the LEGO pieces some more room to breathe. The picture above shows some spreading out.
Once everything’s dry, enjoy your clean LEGO! For me lately, that means sorting and cataloging using Rebrickable. (Hopefully more to come on that in the near future.)
For maintenance, keeping the LEGO pieces covered or in bins when not in use can help minimize dust and dirt buildup.
Hope this helps!


One thought on “11. How to wash LEGO pieces like a pro”